WebMatrix: Advanced Web Development Made Simple
WebMatrix
Advanced Web Development Made Simple
By James Sugrue
12,398 Downloads · Refcard 136 of 185 (see them all)
Download
FREE PDF
The Essential WebMatrix Cheat Sheet
WebMatrix:Advanced Web Development Made Simple
ABOUT WEBMATRIX
Microsoft WebMatrix is a web development tool that provides straightforward functionality for development, testing and deployment of websites. WebMatrix integrates a complete stack– including server, database and programming frameworks—in one place. This tool provides web developers with the ability to deploy their applications onto Windows-hosting service providers.
WebMatrix lowers the barrier for website development for web developers and provides the possibility to create websites from scratch, using templates or existing open-source applications.
This DZone Refcard covers the installation process for WebMatrix and focuses on site creation, supported databases, reporting and some of the helpers available. Users of WebMatrix should be familiar with IIS, SQLServer and ASP.NET.
INSTALLATION
A simple installation for WebMatrix is provided at http://www.microsoft.com/web/webmatrix/ via Microsoft’s Web Platform Installer, which will also guide you through the installation of dependencies such as ASP.Net Pages, SQL Server Compact 4.0 and Microsoft.NET Framework 4.
Installation is as simple as clicking on Spotlight from the Web Platform installer and clicking Add for the components you wish to install.
Additional products and applications can be installed through the same installer.
Once installed, the WebMatrix quick start screen gives a choice of four options.
The following table describes each of the site creation methods available.
| Creation Method | Description |
| Site From Web Gallery | Create a site from a list of open-source ASP.NET and PHP web applications that you can freely use. |
| Site From Template | Create an empty site or choose from one of the customizable templates. |
| Site From Folder | Create a site from a folder of pre-existing web files. |
Using the Web Gallery
When you choose to create a site from the web gallery, you will be presented with a number of well known applications such as WordPress, Drupal, Joomla and many more.
WebMatrix guides you through the process and downloads all dependencies required for the application such as any required databases.
IIS EXPRESS
IIS Express is a lightweight, self-contained version of IIS optimized for developers and is included with WebMatrix.
It has all the core capabilities of IIS 7 as well as additional features designed to ease website development including:
- It doesn’t run as a service or require administrator user rights to perform most tasks.
- IIS Express works well with ASP.NET and PHP applications.
- Multiple users of IIS Express can work independently on the same computer.
Further information on the differences between IIS and IIS Express is available on http://learn.iis.net/page.aspx/868/iisexpress- overview/
SQLSERVER COMPACT
SQL Server Compact is a free, lightweight, file-based database that can be embedded within your ASP.NET application. It supports a rich subset of Transact-SQL syntax and SQL Server data types. Because it’s an in-process database, it requires no interprocess communication.
SQL Server Compact also provides a smooth migration to SQL Server when your application needs to handle larger amounts of data or high concurrent loads.
CREATING CUSTOM SITES
WebMatrix consists of a number of different workspaces, each focused on particular aspects of your website. These can be accessed through the Workspace Selector in the bottom left corner.
WebMatrix Site Workspace
After you choose to create a site, the site workspace is automatically displayed, providing a screen for the configuration of website settings.
The site settings ribbon along the top of the application provides the following functionality.
| Button | Description |
| My Sites | Lists sites that you have created. |
| Publish | Publish your site. During the first time you publish you will be prompted to configure the site publish settings. |
| Run | Runs the site or selected file in the browser. |
| Start | Starts IIS Express. |
| Stop | Stops IIS Express. |
| Restart | Stops IIS Express, releases resources and restarts IIS Express. |
| Requests | Displays the local requests of the site. |
The following table lists the tasks available to manage the site settings:
| Task | Action |
| View Site Settings | Click Settings in the navigation pane. |
| Set the URL and port number | Enter a URL and an optional port number. This setting is preconfigured by WebMatrix and you typically do not need to change it.If changing from localhost, ensure the domain is registered in the hosts file or DNS server. |
| Enable encrypted connections using SSL | Select Enable SSL. This enables you to test SSL using a selfsigned certificate with IIS Express. This setting is not included when you publish your site. |
| Set the .NET Framework version | Select a version from the list (typically the latest version, unless you want to make the site backward compatible).The setting is included when the site is published if the hosting provider allows it.To apply to a remote site click Publish and Check Compatibility. |
| Enable PHP support | Under PHP Settings, select Enable PHP. If PHP is not already installed, WebMatrix will guide you through the installation process.Note that the .NET Framework version must be set to none. Not included when site is published. |
| Manage default pages | Pages listed in the content pane are those that IIS will try to run when the request URL does not point to a specific page. Pages can be added, reordered or deleted. |
Site Requests
The site requests tab provides the following functionality.
| Button | Description |
| Clear All | Clears the list of all requests. |
| Only Errors | Displays requests that results in errors. |
| Ignore Images | Removes requests that get images from the list. |
| Capture Requests | Turns request monitoring on or off. |
The following tasks are available from the site requests view.
| Task | Action |
| View Requests | Click Requests in the View group in the ribbon. Select an individual request to see details. |
| Search for a specific request | Enter the text to find at the top of the content pane. |
| View errors | Click Only Errors on the ribbon. Select an error in the content pane for details. |
| Clear existing requests | Click Clear All in the ribbon. |
| Stop capturing requests | Click Capture Requests in the ribbon. |
The following values indicate the status of requests, all of which are standard HTTP response codes:
| Status Code | Description |
| 2xx | Success |
| 3xx | Informational (e.g. Redirect) |
| 4xx | Error on the client |
| 5xx | Error on the server |
WebMatrix Files Workspace
The Files Workspace allows you to manage the files and folders of your website. This can be accessed via the Files link in the workspace selector.

File Types
WebMatrix allows you to add a number of different file types to your web site. In addition to HTML, CSS, JScript, classic ASP and .NET files, you can add PHP and SQL scripts.You can also click on the Visual Studio button to launch the website as a Visual Studio project in Visual Web Developer Express.
DATABASE INTEGRATION
WebMatrix Database Workspace
The Database Workspace provides functionality for the management of databases and allows you to run queries.
Database Ribbon Functions
| Button | Description |
| New Database | Creates a new SQL Server Compact database. |
| New Connection | Creates a new connection to either one of SQL Server, SQL Server Compact or MySQL databases. |
| New Table | Creates a new database table. |
| New Query | Creates a new database query. |
| Execute | Run a database query. |
| Migrate | Migrates an SQL Server Compact database to SQL Server. |
| Install | Installs SQL Server Express. |
Table Ribbon Functions
| Button | Description |
| New Table | Creates a new table. |
| Definition | Creates and modify a table schema. |
| Data | Displays table data. |
| New Column | Adds a column to the table. |
| Delete Column | Deletes a column from the table. |
| New (Relationship) | Creates a new relationship between tables. |
| View (Relationship) | Displays existing relationships between tables. |
| Delete (Relationship) | Deletes a relationship between tables. |
| New (Indexes) | Creates a new index. |
| View (Indexes) | Displays existing indexes. |
| Delete (Indexes) | Deletes an index from a table. |
| Refresh | Refreshes table data. |
| Delete Row | Deletes a single row from the table. |
Connecting to a Database
WebMatrix includes SQL Server Compact, a lightweight version of SQL Server, which creates .sdf files in the App_Data folder of your website. Deployment is as simple as publishing this .sdf file.
You can also connect to SQL Server, SQL Server Express, or existing MySQL instances. Choose the type of database that you are using in the Database Type dropdown in the New Connection dialog box.
If the connection is successful, the database will appear in the Databases workspace.
DATABASE MIGRATION
You can migrate from SQL Server Compact to either SQL Server Express or SQL Server. SQL Server has many useful features, including stored procedures, handling over 256 concurrent connections and handling databases that are larger than 4GB.
From the databases workspace, select the database that you want to migrate and click on the Migrate button.
The default migration will be to a local instance of SQL Server Express. Change the settings if you are migrating to SQL Server or to SQL Server Express on another computer.
Using the Database in Your Website
The following section provides a quick reference for the usage of databases in your application code.
| Action | Code |
| Open Database | var db = Database.Open( |
| Run Query | db.Query(<query string>); db.QuerySingle(<query string>); |
| Loop Through Results | foreach(var row in db.Query( query string>) |
The Database.Open method allows you to open a .sdf file to access SQL Server Compact databases. However, you can also pass through a connection string, which is stored in a web.config file as follows.
<?xml version=”1.0” encoding=”utf-8” ?>
<configuration>
<connectionStrings>
<add
name=”SQLServerConnectionString”
connectionString= “server=myServer;database=myDatabase;uid=user
name;pwd=password”
providerName=”System.Data.SqlClient” />
</connectionSt
</configuration>
REPORTS
WebMatrix Report Workspace
The Reports Workspace provides functionality to run site analysis reports and review any errors found by WebMatrix.
Report Ribbon Functions
| Button | Description |
| New | Creates a new report. |
| Re-run | Creates a new report based on an existing report. |
| Delete | Removes an existing report. |
| Export | Saves the results of a report to a CSV file. |
| Performance | Filters to show only performance-related violations and the load time for all site pages. |
| SEO | Filters to show only search engine optimization (SEO) violations. |
| All | Displays all violations. |
| URL | Groups violations by the URL in which they were found. |
| Issue Type | Groups violations by the name of the issue. |
Reports can be created on local or live sites through the New button. Enter a name for the report and a URL to start analysis from.
Search Engine Optimization
Once you have run an analysis report on your site, clicking on the SEO button will show all the SEO related issues.
Clicking on each individual issue will display details of the violation as well as recommendations on how to fix the issue.
Clicking on the Edit this page link will bring you to the file editor so that you can address the violation.
Once you have fixed an errors found, re-run the report to ensure the fixes are successful.

IIS Search Engine Optimization Toolkit
For more detailed analytics and queries, you can use the IIS Search Optimization Toolkit against any website you have created simply by providing the address of the site in the initial dialog.PUBLISHING YOUR SITE
The .PublishSettings File
A .PublishSettings file contains all the information needed to publish your website, including server name, login details, the destination path for your website and the protocol you are using to publish the site.
Finding a Hosting Provider
Click on the Publish button and choose Find Web Hosting… This brings you to a page on Microsoft’s Web site with hosting options and the ability to narrow the results by price, location and other factors. Some hosting providers will send you a .PublishSettings file containing the settings you require. Spotlight offers can be found at http://www.microsoft.com/web/Hosting/.
Configure WebMatrix for Hosting
Choose the Settings… option from the Publish menu.
If you already have a .PublishSettings file, you can import it here. Otherwise, just enter the required settings.
| Setting | Description |
| Server | Enter the “Service URL” or “Server Name” provided by the hosting company. |
| User name / Password | Enter the credentials provided by the hosting provider for your account. Note that if the database may have a different username/password. |
| Site Name | Enter the “Site” or “Site/Application” value from the hosting company. |
| Destination URL | The URL that people will use to access your site over the internet. |
If you are using a database other than SQL Server Compact, you will need to provide the connection string to your database.

Click on the Publish… menu option to deploy the site to your hosting provided. A useful preview screen is displayed where you can review the files that will be transferred, including the database.
Editing a Published Site
Editing a Published Site If you wish to make further changes to your site, the Download Published Site… menu option allows you to copy down the website from your hosting provider. Once all changes are made you can redeploy the site using the Publish… option.
SECURITY
Testing SSL in WebMatrix
If your site contains any sensitive information, you will need to provide the ability to access pages through https://, or the secure sockets layer.
In the sites workspace, choose Settings. Under SSL Connection click on Enable SSL.
WebMatrix will then create a self-signed certificate for local testing. Once you publish your site, you will need to get a certificate for your website. Your hosting provider may have this included in your plan.
RAZOR SYNTAX REFERENCE
ASP.NET server code can be added to your pages using the Razor syntax, based on .NET.
Razor Syntax Reference [using C#]
| Type | Example |
| Statement block | @{ var myMessage = “Hello World”; } |
| Inline expression | <p>The value of myMessage is: @myMessage</p> |
| Adding text to code | @if(condition){<text> normal text</text>} |
| Expression and text | @myMessage, @name |
| Server Side Comment | @* Comment *@ |
| Escape @symbol | @@myMessage |
Helpers
A helper is a component that simplifies common tasks, such as Twitter and Facebook integration. A number of helpers are available. These can be installed through the ASP.NET Web Pages Administration tool in the site workspace. This brings you to a package manager containing a list of available add-on packages.
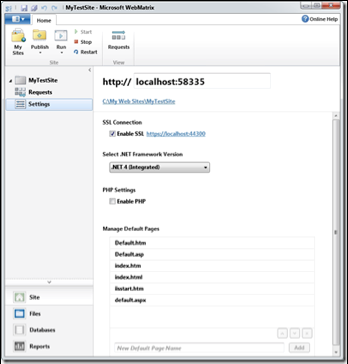
You can install helpers by going to the administration page of your site http://localhost:<port>/admin and following the instructions through the Package Manager.
Adding Search Using the Bing Helper
The following code snippets show how to use the Bing Helper to add search to your site.
Set up the site to search:
@{
Bing.SiteUrl = “www.dzone.com “;
Bing.SiteTitle = “DZone Custom Search”;
}
Display a simple search box that will open results in a new browser window:
@Bing.SearchBox()
Display an search box that will show results in the same window:
@Bing.AdvancedSearchBox(
boxWidth: “300px”,
resultWidth: 600,
resultHeight: 900,
themeColor: “Green”,
locale: “en-US”)
Social Networking
The Twitter helper allows you to embed Twitter feeds on your webpage.
Display a list of tweets from your profile use :
Twitter.Profile(“username”)
Display a Twitter search area:
@Twitter.Search(“<Insert search criteria here>”)
The Facebook helper provides the capability to add a Like button to your website.
Display a Like button for the current page:
@Facebook.LikeButton()
Display a Like button for a specific page:
@Facebook.LikeButton(
href: “http://refcardz.dzone.com”,
action: “recommend”,
width: 250,
buttonLayout: “button_count”,
showFaces: true,
colorScheme: “dark”)
Adding Email
The WebMail helper makes it easy to send emails from your website.
Email information is set through a number of variables.
@{
WebMail.SmtpServer = “your-SMTP-host”;
WebMail.SmtpPort = 25;
WebMail.EnableSsl = true;
WebMail.UserName = “your-user-name-here”;
WebMail.From = “your-email-address-here”;
WebMail.Password = “your-account-password”;
}
Sending the email is done using the Send method. Note this should be done with a try-catch block in case of failure.
@{
WebMail.Send(to: “me@dzone.com”,
subject: “Email subject”,
body: bodyContent
}
Caching Information
The WebCache helper provides caching functionality for your website.
Items are stored in the cache using a key.
@{
WebCache.Set(“myKey”, @DateTime.Now, 1, false);
}
Items are later retrieved using the same key.
@{
WebCache.Get(“myKey”);
}

Debugging Tips
WebMatrix provides two helpers to assist with debugging: ServerInfo and ObjectInfo.
ServerInfo provides four separate views of information about the server environment.
| Type | Example |
| Server Configuration | Information about the hosting web server, including the version of ASP.NET. |
| ASP.NET Server Variables | Details of HTTP variables, and values that are part of each web page request. |
| HTTP Runtime Variables | Details about the version of the .NET Framework that is running. |
| Environment Variables | ll the local environment variables and their values on the web server. |
ObjectInfo displays the type and value of each object that is passed through to its print method:
ObjectInfo.Print (variable)
For further debugging, you can use Internet Explorer Developer Tools or FireBug.


